Intro to React Server Side Rendering
How to build a React SSR app without any tooling or framework

This is the first in (hopefully) a series of articles to document the lessons I learned building and maintaining SSR apps.
This article does not cover the pros/cons of SSR, or the pros/cons of not using tooling or frameworks (e.g., Create React App, Next.js, etc).
I fully acknowledge that manually setting up build configs is painful. There is plenty of great tooling out there to abstract away these configs, so you probably don’t even need to touch any of this stuff to build awesome apps.
But for those ready to embrace the pain…
Overview
Let’s start with the basics. We will use React, webpack, and Express to build an SSR app that works as follows:
- Browser sends HTTP request to server to load a page.
- Server receives HTTP request and turns React JSX into HTML markup.
- Server inserts the markup into a HTML template and sends the HTML response back to the browser.
- Browser renders the HTML, downloads the client-side JavaScript bundle, and “hydrates” the HTML.
Also, I will focus on dev mode to keep this article short. I’m saving production mode for a future(ish 😅) article.
Project structure
Before diving into the code, let’s get situated with the project structure.
.
+-- client
|   +-- components
|   |   +-- App
|   |   |   +-- index.js
|   |   |   +-- style.less
|   +-- index.js
+-- server
|   +-- index.js
+-- babel.config.js
+-- package.json
+-- webpack.client.config.js
+-- webpack.server.config.js
+-- webpack.shared.config.js
A quick rundown of the files in this project:
./client/componentscontains React and CSS code../client/index.jsis the client-side entry point for webpack, where we “hydrate” the HTML rendered on the server-side../server/index.jsis the server-side entry point for webpack, where we define the route to serve the HTML page../babel.config.jsis the thing that enables you to use React JSX and ES6+ features in the browser and Node.js. You may have seen alternative versions of this file (.babelrc,babel.config.json, etc)../webpack.shared.config.jsis the config that webpack uses for both client-side and server-side code../webpack.client.config.jsis the config specific to the client-side code../webpack.server.config.jsis the config specific to the server-side code.
Dependencies
Here are the dependencies (and versions) used at the time of this writing. I will also mention which relevant dependencies to install in each of the following sections.
Now let’s look at each file in our project in more detail.
webpack
If you are accustomed to building SPAs (Single Page Apps), you may not have needed webpack to process your server-side code. But to enable SSR, the server must be able to read React code, or specifically — JSX. This means, we now need webpack to work its magic on our server-side code. Plus, you’ll also get to use ES6+ syntax that may not be natively supported in Node.js, e.g., import and export. (Sidenote: you don’t need webpack if you choose not to write JSX at all. 😬)
I won’t go through every webpack option in great detail, but here is a great explainer if you are interested.
Common webpack config for client-side and server-side
Install the relevant dependencies:
npm i webpack webpack-cli babel-loaderAnnotations of the code comments above:
[A] For our purposes, we want to explicitly set mode to development. If we go with the default value of production, we may lose useful console warnings/errors from libraries like React, and the error stack traces are incredibly hard to read due to code minification. Read more about production and development modes here.
[B] This tells webpack to preprocess .js files with babel-loader, which transpiles ES6+ and JSX code into JavaScript code that is readable by browsers and Node.js servers. This loader uses the options we specify in babel.config.js.
[C] This means I don’t have to type out .js or .less when importing files with those extensions. For example, import App from ‘./components/App’.
Babel config
Install the relevant dependencies:
npm i babel-loader @babel/core @babel/preset-env @babel/preset-reactAnnotations of the code comments above:
[A] This tells webpack to transpile ES6+ features into JS code that’s natively supported in Node.js and (most modern) browsers. Read the docs for more details.
[B] This tells webpack to transpile React JSX into JavaScript code. Read the docs for more details.
Client-side webpack config
Install the relevant dependencies:
npm i webpack webpack-cli webpack-merge webpack-dev-server mini-css-extract-plugin css-loader less-loader lessAnnotations of the code comments above:
[A] This is the entry point for the client-side code, where we render the React app into the DOM.
[B] This tells webpack to save the transpiled client-side JS bundle output as ./build/client/scripts/bundle.js. Not super important for dev mode because we are using webpack-dev-server to transpile the client-side bundle “in memory”. Per the docs:
webpack-dev-serverdoesn’t write any output files after compiling. Instead, it keeps bundle files in memory and serves them as if they were real files mounted at the server’s root path.
[C] The publicPath option tells webpack where we will be serving the client-side bundle. Notice that we are using the same clientPort for devServer, which tells webpack-dev-server to serve the client-side bundle from http://localhost:8080/. And since the filename option tells webpack to nest bundle.js in a scripts folder, the client-side bundle will be served from http://localhost:8080/scripts/bundle.js.
[D] CSS modules and CSS preprocessors (e.g., Less, Sass) deserve an article. But in a nutshell, this piece of config tells webpack to:
- transpile
.lessfiles into CSS code that the browser understands, - allow us to
import style from ‘./style.less’which is scoped locally to the component importing it (i.e., we don’t have to worry about CSS class naming collisions or specificity issues as the app grows), - generate a CSS bundle that’s served separately from the JS bundle. In this instance, the
MiniCssExtractPlugintells webpack to serve the CSS bundle fromhttp://localhost:8080/styles/bundle.cssin dev mode.
[E] Remember webpack.shared.config.js? This line merges webpack.shared.config.js with webpack.client.config.js.
Server-side webpack config
Hang in there, this is the last webpack config that we’ll cover.
Install the relevant dependencies (and grab a ☕️):
npm i webpack webpack-cli webpack-node-externals css-loaderAnnotations of the code comments above:
[A] The default value is web, so we need to explicitly set it to node for webpack to work its magic on the server-side code.
[B] This is the entry point for the server-side code.
[C] This tells webpack to save the transpiled server-side JS bundle output as ./build/server/bundle.js.
[D] This tells webpack not to include the code from node_modules in the server-side bundle.
[E] This tells webpack not to do any work over the CSS code on the server-side, but simply to make sure that every HTML element’s className matches that in the CSS code being served on the client-side.
[F] Remember webpack.shared.config.js? This line merges webpack.shared.config.js with webpack.server.config.js.
React component
Install the relevant dependencies:
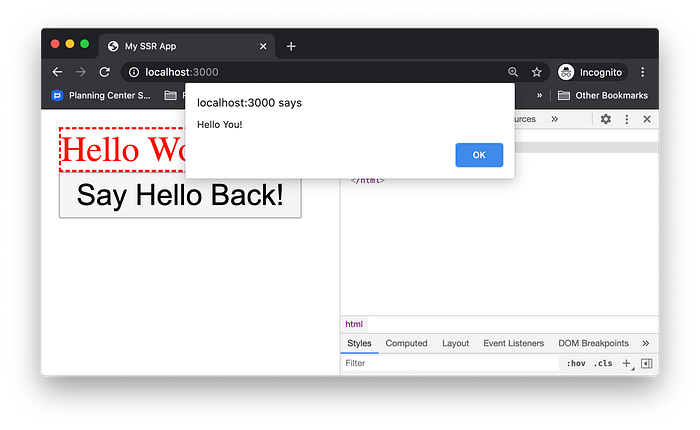
npm i reactLet’s create a simple React component App, which renders our favorite greeting with some basic styles, as well as a button that displays an alert dialog when clicked. We will render this component on the server-side and hydrate it on the client-side.
Server-side code
Install the relevant dependencies:
npm i express react react-domLet’s create an Express server and define a route that serves an HTML page when a user visits http://localhost:3000/
Annotations of the code comments above:
[A] This turns the React component App into HTML string, which we then insert in between the div with the ID “ssr-app”.
[B] Remember the devServer option in webpack.client.config.js to start webpack-dev-server in dev mode? These script and link tags tell the browser to fetch the client-side JS and CSS bundles respectively from the webpack-dev-server running on http://localhost:8080.
Client-side code
Install the relevant dependencies:
npm i react react-domIn the client-side entry point, we will “hydrate” the React component that was SSR-ed into the root DOM container with the ID “ssr-app”.
Per the docs:
If you call
ReactDOM.hydrate()on a node that already has this server-rendered markup, React will preserve it and only attach event handlers, allowing you to have a very performant first-load experience.
So in this example, the client-side code simply attaches the button’s click handler without having to re-render any markup in the App component.
Putting it all together
Install the relevant dependencies:
npm i rimraf webpack webpack-cli webpack-dev-server npm-run-all nodemonThis is the scripts key in the package.json file, where we define several npm scripts to build and start the app in dev mode.
Let’s look at each of them:
clear— This uses rimraf to delete the./buildfolder.build:server— This tells webpack to build the server-side code and save the bundle output to./build/server/bundle.js(as per./webpack.server.config.js).start:server— This starts the Express server onhttp://localhost:3000.dev:server— This uses nodemon to monitor any file changes in the working directory (minus./build), and npm-run-all to re-runclear,build:server, andstart:serverwhenever there are file changes.dev:client— This tells webpack to “build” the client-side code, save the bundle output “in memory”, and serve it fromhttp://localhost:8080(as per./webpack.client.config.js).dev— This runs all of the above with a single command.
Run npm run dev in the terminal to spin up the SSR app. Open up http://localhost:3000 in your browser. 🎉🥳
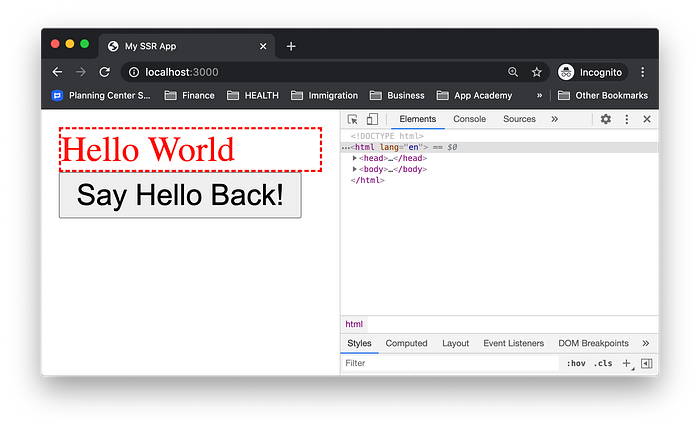
And click on the button Say Hello Back! 🙌🎊
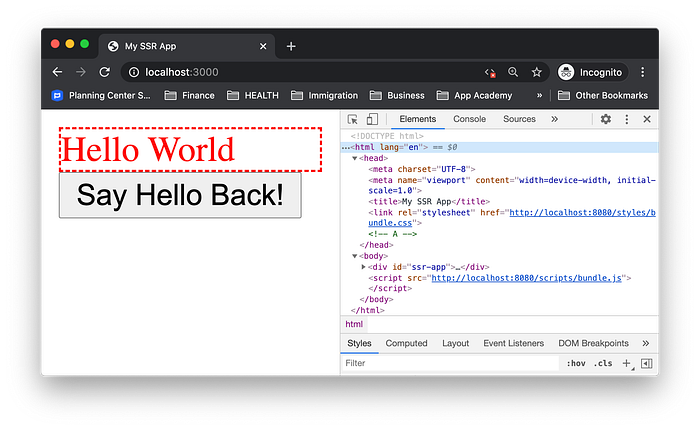
Now, let’s disable client-side JavaScript…

…and refresh the page. IT’S NOT A BLANK PAGE! 🤯
Sidenote: nothing will happen if you click on the button. That’s because the event handlers are attached by the client-side code (aka “hydration”). Recall the docs:
If you call
ReactDOM.hydrate()on a node that already has this server-rendered markup, React will preserve it and only attach event handlers, allowing you to have a very performant first-load experience.
And since we disabled client-side JavaScript, what you see is just plain HTML.

In future(ish 😅🤞🏻) articles, I plan to cover more advanced features like routing, data fetching, caching, code-splitting, lazy-loading, and deploying a production app.