How to Get Started As a Front-end Web Developer in 2022 (Complete Roadmap with Free Resources)
A guide on how to become a front-end web developer in 2022.
Becoming a self-taught web developer in 2022 is easier than ever. There are plenty of free resources around, and there are easy-to-follow-through resources available to you to help you stay on the right track.
First. There are plenty of amazing free resources you can learn from. Sure, you can go buy a bunch of courses on Udemy, Coursera, etc. and a bunch of them are quite good. But. I am here to tell you that there are several free courses out there that are just as good, if not better.
Let’s brew a fresh cup of coffee, and get started.
Step 1. Familiarise yourself with the command line
No matter which programming language you pick.
No matter the operating system your computer runs on.
Familiarity with the command line (or your terminal) is a must. You will need to do things in here over and over again.

Most things you will do over here will be fairly mundane, for example, installing Node.js, getting your development environment ready, etc.
But. As you progress further in your programming journey, you will find yourself using the terminal more and more.
So it makes sense to get a hang of it from the get-go.
The good news? It is not hard, and you would get used to your terminal in no time. So why not go ahead and do it.
FreeCodeCamp.org has a nice little video if you prefer videos:
If you prefer a more text-heavy tutorial that you can follow along, here are a couple of alternatives:
- Command line for beginners (by Ubuntu)
- A complete intro guide to command line (by LearnToCodeWithMe)
- Learn the command line (by Codecademy)
- Command Line Crash Course (by Mozilla)
What you should focus on is to learn how to do the basic things. For example, creating directories, files, etc., navigating between directories, deleting directories, installing packages. There is a lot more that you can do with the command line, but to get started, these will fulfill most of your requirements.
You can always get to the advanced stuff if and when the need arises.
Step 2. Familiarise yourself with Git
Git is a version control system.
It helps you keep your code organized, track any changes you have made in your code, and among other things, can even act as a backup of your code.
There are multiple git providers you can use:
You can choose any one of them. I got started with GitHub, and since then have pretty much stuck to it.

Much like the command line, there is a lot you can do in git, but to get started on your web development journey, there are just a few things you need to learn how to do:
- How to connect your local development environment (your computer) to your git account
- How to create a new repository
- How to push your code to your git repo (This is what you would be doing the most)
- How to pull code from a git repo to your computer
You can learn Git in no time from this video:
Brad Traversy creates a bunch of awesome content helpful for developers at all stages of their learning journey. If you find yourself going down that rabbit hole and binge-watching his videos, it is perfectly understandable. 😁
Step 3. Pick a code editor. (Pssst. Just go ahead and download VSCode)
You’ll need a code editor.
This is where you will write your code. This is the one piece of software you will use the most, and spend most of your time on. Updating your git repo with your latest codebase. Deploying your websites to production (a web URL). All of it, you would be doing from inside your code editor.
VSCode is a free code editor that is both quite powerful and can be made even more powerful by adding themes and extensions to it. You can download it from here.
FreeCodeCamp has a crash course video on VSCode, that you can use to know more about it. Word of caution though, it is almost 1.5 hours long. If you are looking for something that will take less time, there are links to Brad’s videos later.
Brad’s videos on VSCode:
- VSCode Intro and Setup (38 min)
- VSCode Extensions for front end developers (28 mins)
- VSCode shortcuts (17 mins)
Step 4. Familiarise yourself with the deployment process by creating a simple website
I am a huge fan of learning by doing. So let us do that.
- Create an empty repo in your GitHub account
- Add a simple index.html file to it.
- Add the following code to your index.html file
<html><head></head><body><h1>Hello World<h1></body></html>Hint: You can create a boilerplate html file in VSCode by simply typing “!” and selecting the emmet abbreviation. VSCode will create the file for you. Now all you need to do is write “Hello world” within the <body></body> tags that VSCode has just inserted for you.
- Push your code to your git repo (You should know how to do it once you familiarised yourself with GitHub earlier)
This was the hard part.
Deploying it to a web URL is easy.
Create a free account on Vercel. Connect your GitHub account to your Vercel account.
Once you have connected the two, you will be able to create a new project in Vercel and select the GitHub repo where you just created the index.html file.
Press “deploy”.
That’s it. Within minutes, Vercel will deploy your website and give you a URL where you can see it for yourself.
What’s more:
- Any time you make changes to your files, as soon as you push it to your GitHub repo, Vercel will automatically make the changes in your live website
- index.html would be visible on https://yourdomain.vercel.app. If you create an about.html, it will be accessible on https://yourdomain.vercel.app/about.html
- Vercel will handle the SSL certificate for your domain. All your websites will have the sweet green lock in the browser’s address bar indicating a secure site.
- You will be able to change the URL on which you see your website by adding any domain you own to your project’s domain settings. For free!
There are a bunch of other hosting options available to you. From Heroku to Netlify. From Google’s Firebase to GitHub pages. In my experience, Vercel is the easiest and simplest of them all, so once I started using it, I have never turned back.
Step 5. Start creating websites
Okay. This would be a controversial step, but one I followed myself, and one I would recommend.
You would come across many articles advocating you a different approach, and from a foundational and theoretical approach that makes sense.
Their approach is a five-step process:
- Learn the basics and fundamentals of HTML and CSS
- Learn the fundamentals of JavaScript
- Learn a CSS framework (Tailwind, Bootstrap, Bulma, etc.)
- Learn a JS framework (React.js, Vue.js, Svelte, etc.)
- Practice, practice, and practice.
I found myself stuck in tutorial hell. There is just so much content out there that you can be learning for weeks and months and months before you start making any headway.
And in the world of instant gratification, weeks and months just weren’t cutting it for me.
So I started picking projects up and developing them. And that is the approach I am recommending to you.
The benefits of this approach:
- It is faster
- It is simpler
- It is more gratifying
The downfalls of this approach:
- You’ll be faced with questions more often
- You will discover a better way of doing things every once in a while
- You’ll learn new things that if you knew sooner would have made your previous projects much easier and faster
The biggest benefit of it all:
You could get started with this approach and within a week you will have your first fully responsive, HTML template for sale on Gumroad, Themeforest, or wherever you want to sell themes at.
How to get started with this approach:
- Spend 2 days learning the basics of HTML, some CSS, and some JavaScript. You mustn’t spend a lot of time trying to learn everything you can. You need to learn just enough for the languages to make sense to you.
- Spend 2 days learning the basics of Vue.js. Build a simple webapp using Vue. Follow along with any basic youtube tutorial. Make anything. It doesn’t matter. You are just familiarizing yourself with the framework.
- Visit https://nuxtjs.org/docs/get-started/installation to create your first Nuxt.js project. (Nuxt is a framework for Vue, which in itself is a framework for JavaScript. Using Nuxt will speed up your development process and will be better for you in the long run.)
- Start creating simple apps and components. For example, (1) create a simple website with a menu from a website you love, (2) create a to-do list app, (3) create a website that uses weather API to display the weather, (4) create a website that has one page login protected, i.e. you need to log in to access that page.
Every single website (or web app) you create will help you ask multiple questions, all following the same format: “How do I do X?”
Figure out the answer to that question. Use that solution in your project. You will end up learning much more, and remember it better than simply following along one tutorial after another.
The more you practice, the better you will get at building anything you could possibly think of.
But what if you did not want to follow this unconventional approach?
If you are inclined to do things the traditional way, you should do that. We all should follow the methodology that works the best for us and the one we are most comfortable with.
The core objective is the same. Help you learn the core fundamentals of everything you will need in your arsenal to become a kick-ass front-end developer.
Here is a list of websites and resources that will help you immensely:
1. freeCodeCamp
Chances are you had already heard of freeCodeCamp. If you hadn’t, go check them out today!

What started as a Medium publication by Quincy Larson is one of the go-to destinations for web developers today.
And whatever you can think of, they pretty much have courses for that.

2. #100DaysOfCode
If you want to walk fast, walk alone. But if you want to walk far, walk together.
100DaysOfCode is all about that.
Learning web development, like picking up any new skill, is a challenge, to begin with, and it gets easier with time.
The problem is, many will call quits and give up in those early days itself. In comes, #100DaysOfCode.
As the name suggests, it is a Twitter hashtag, and it has endured the test of time. Every day, more and more web developers are joining the challenge.
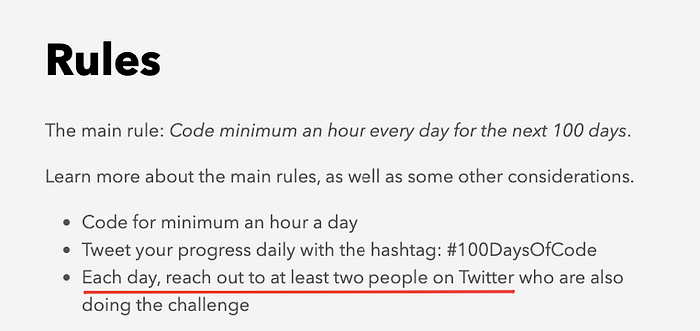
The idea is not just to help you learn by making sure you are holding yourself accountable by sharing your progress with everyone around you, but at the same time, helping you realize that:
a. You are not in it alone. Countless others are wading through these tough waters. That single feeling of togetherness is all you need sometimes.
b. You are a part of something bigger than yourselves. You will constantly find yourself face-to-face with developers who are struggling with exactly what you were struggling with a few weeks back. You are the best person to let them know that it gets easier. You are the best person to tell them to hang on.
c. It is okay to seek help. Many times, you will be faced with challenges that you won’t be able to handle on your own. In those times, you should actively seek help and guidance from others. Just as you were willing to help someone else, you will find there are countless out there willing to help you out.
You can learn more about the challenge on their official website.
3. TailwindCSS
If you are just getting started with web development, I want you to forget about learning CSS.
I want you to forget about the fact that other CSS frameworks even exist.
I simply want you to pick up Tailwind, and stick with it.

It is going to make your web development so effortless and fast that you will find it difficult to even think about any other CSS framework once you get started with Tailwind.
Oh, and your CSS file? The final compiled usable CSS file size is small enough to make your site load blazing fast. But since we are just starting, we would not worry too much about that right now.
When you get started, you will find yourself constantly referring to their documentation to figure out which utility classes you need to use. Their detailed documentation makes this process extremely smooth and stress-free.
And as you keep on developing more and more websites and components using Tailwind, you will find the need to refer to their documentation reducing with time.
Here is Tailwind explained in 100 seconds:
And now that you have fallen in love with Tailwind, watch Adam Wathan (founder of Tailwind) build the Vercel dashboard using Tailwind in a live stream:
Or, if you are looking for a short and sweet tutorial, here is one by Fireship:
PS: I wasn’t going to include two tutorials here, but then I came across these comments on the Fireship video.

It would have been a sin not to include the video even after reading those.
Anyway. If you still want to play around with Tailwind first, they have made something just for you.
4. JavaScript
You can use FreeCodeCamp to learn the fundamentals of JavaScript.

5. React or Vue
When it comes to picking a javascript framework to get started with, you can’t go wrong with either React or Vue. Both are quite powerful, versatile, and have their own set of following.


I got started with Vue, and I have loved every second of it. If that is what you want to go with, you won’t regret your choice.
React, however, is more popular. So, if your goal is to make a career in web development, I think you will find a much higher demand for React developers.
So, depending on what you are aiming for, choose your framework.
6. Next.js or Nuxt.js
There are JavaScript frameworks, and then there are frameworks for the frameworks.

Next.js is a framework for React (by the guys at Vercel).
And Nuxt.js is a framework for Vue.
The main benefit that these bring to your development process is to make server-side rendering possible for your apps. Javascript frameworks are notoriously client-side rendered (on the user’s browser), so there are serious SEO limitations. Next and Nuxt help take care of that.
Other than that, they do make developing web apps insanely fast, over the already fast frameworks they are built to support.
That’s it. Get started today, and in no time you will find yourself developing amazing websites.
In addition to the websites and resources mentioned above, here are a few that will help you tremendously:
- Vercel — Give all your web apps their own space on the internet
- Firebase — Completely serverless infrastructure. From NoSQL database to user login management, Firebase will handle all of it with very little code. All of this is for free. You will need to put in your credit card details to use Cloud Functions though (which I recommend), but for the time being, we can ignore it. [We will talk about Cloud Functions and their power at a later time.]
- Dribbble, Behance — These websites will help you get started with good website designs. Find some amazing landing page designs here, and use TailwindCSS to see if you can turn those designs into fully functional web pages.
- ThemeForest, TemplateMonster, Gumroad — Create beautiful webpages and templates, and put them up for sale. There is nothing that beats the feeling of making that first dollar from something you have just learned. It gives a lot of boost and energy to your efforts and hard work.
Was this post helpful?
What else would you have wanted me to cover in here?
What topics would you want me to cover in the future?
Let me know in the comments below, and I will try my best to act on them. 👊
I’ll be sharing more content for both front-end and back-end developers in this space. Follow along to stay updated on my latest posts.
What are you planning to learn in 2022? I can’t wait to see what you have to share.
Till next time, stay safe, stay full of life. Cheers!
More content at plainenglish.io. Sign up for our free weekly newsletter. Get exclusive access to writing opportunities and advice in our community Discord.