Google API Authentication using OAuth2.0 and Passport.js in Node.js

What is OAuth?
OAuth is an authorization protocol and it stands for Open Authorization. Many sites including Medium use it to directly log into another third-party application without filling a separate form. Now, users don’t need to remember passwords separately for different applications. With the help of OAuth, the user can log in to multiple sites using the account details of the primary account. Like here we will be using a Google account.
What is Passport.js and why do we need it?
Passport is authentication middleware for Node. It is required to handle the authentication of requests. It is an authentication module used with the Express framework and helps in web development.
Prerequisites
- Install Node.js:
Run these commands in cmd/terminal.
sudo apt-get install curlcurl -sL https://deb.nodesource.com/setup_12.x | sudo -E bash -sudo apt-get install -y nodejs
2. Install npm:
If you have the latest version of Nodejs you don’t need to install npm separately, otherwise to install the latest version of npm globally run this command in cmd/terminal.
sudo npm install npm@latest -g3. Install express:
If your npm is of the latest version you don’t need to mention — save.
npm install ejs express — save4. Install passport and passport strategy for authenticating with Google API:
npm install passport passport-google-oauth20Code snippet:

Below mentioned are the steps to be followed:
- The clientID and clientSecret used above are to be taken from the https://console.developers.google.com.
- Remember these keys are confidential, hence I have put them in a separate file.
- Make sure you already have a Google account. Log in with that.
- This is the Google Developers Console’s Dashboard.
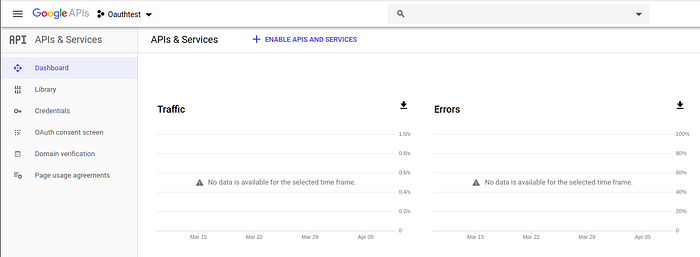
- If you want to create a new project, click on the arrow beside the Oauthtest.

- Click on the NEW PROJECT.
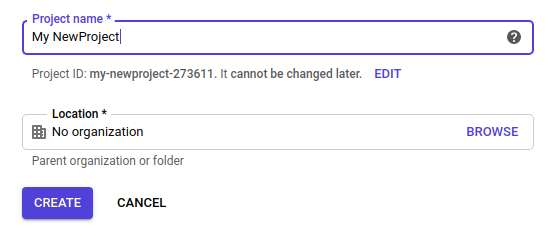
- After this click on the CREATE button.
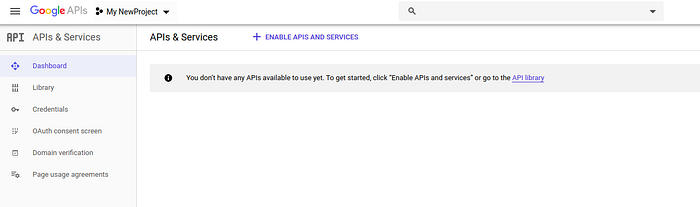
- Now, you will be seeing the Dashboard. You need to Enable the APIS*
- Click on the ENABLE APIS AND SERVICES.
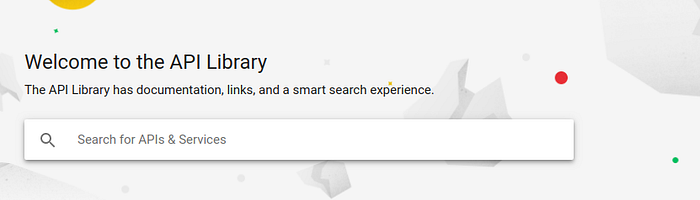
- Search for Google+ API.
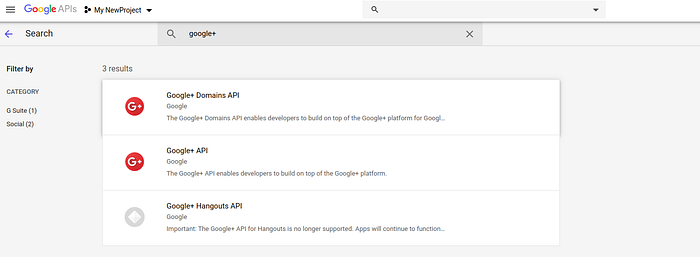
- Select the second one as per my list i.e. Google+ API.
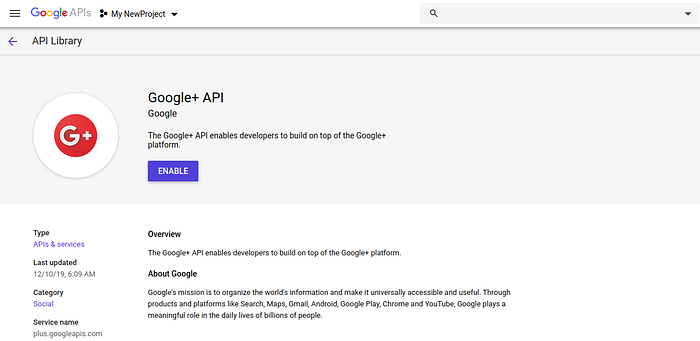
- Click on the ENABLE button to enable the Google+ API.
- Select Credentials from the left pane.

- Click on the CREATE CREDENTIALS.

- Choose OAuth client ID.

- Click on Configure Consent Screen.
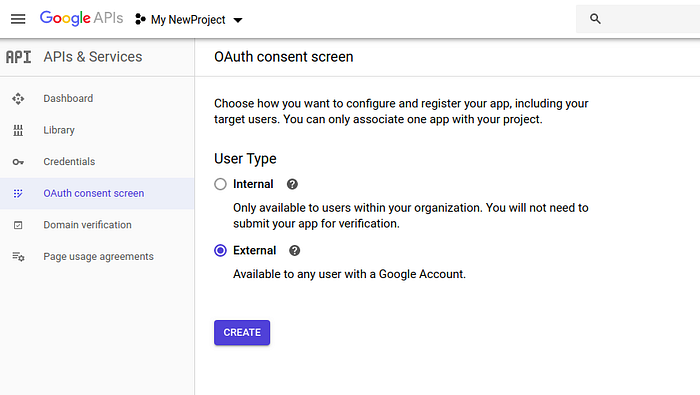
- Choose External and click on CREATE button.
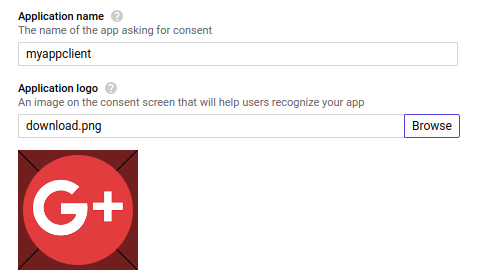
- Enter the application name:
- Upload the image for the logo.
- Support email will be your Gmail account entered by default.
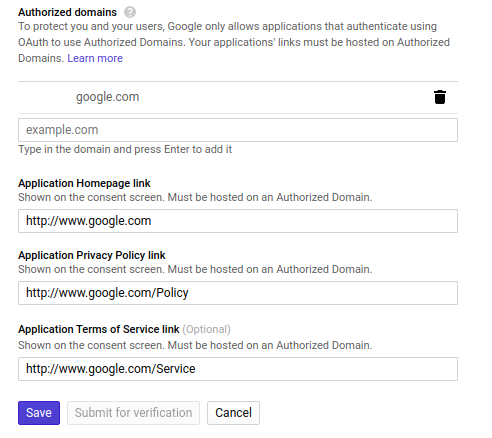
- In Authorized domains, enter your website, you can enter anything I’ll be entering google.com.
- In Application Homepage link, enter http://www.google.com
- In Application Privacy Policy link, enter http://www.google.com/Policy
- In Application Terms of Service link, enter http://www.google.com/Service
- Click on the Save button.
- Again go to Credentials>Create Credentials>OAuth client ID.
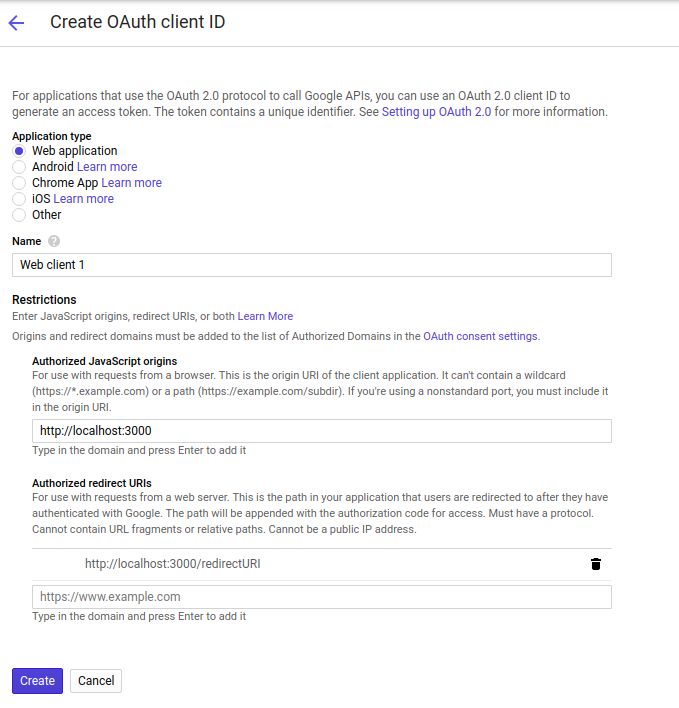
- Choose your required Application type. We are working on a web app so I’ll go with Web Application.
- Fill the Name and restrictions as shown in the figure above.
- Then click on the Create button.
Authorized Javascript Origins is the the URL where your application is running so that Google can know where the application is going to run.
Authorized Redirect URIs is the link where the application will be redirected after the user grants the permission to access the information from the Google Account.

- Click on the Web client 1 to access the ClientID and ClientSecret keys.
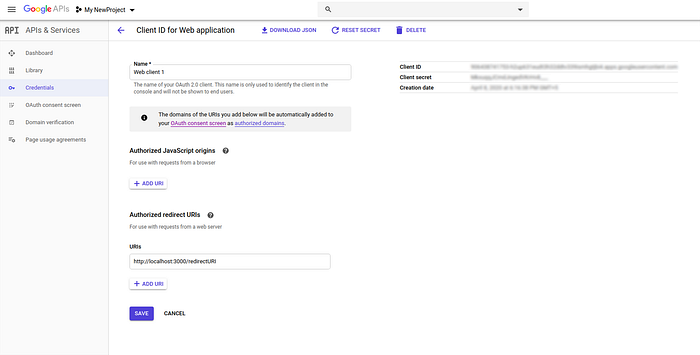
- Copy these Client ID and Client Secret keys into your code.
This makes OAuth2.0 applicable in your application.
Conclusion:
This is my first blog and I hope you liked this.
To know more, you can read from https://console.developers.google.com. You can also read from Nodejs Official Documentation, Express Official Documentation and Passport Official Documentation to enhance your learning.
For any suggestions or improvements, you can write in the response section below. You can also connect with me on LinkedIn, Twitter and GitHub. Thank you for taking the time to read this. Good luck!
More content at plainenglish.io